Stefan Winkler's Blog
Sometimes I need to test something in a VM which has an independent system time. Usually, this has to do with server applications which react time-based (think of a system in which users may enter information until a certain day is reached, after which only read-only is allowed).
On a standard installation of VirtualBox and Ubuntu 16.04, the system time is automatically synced to the host. When trying to change the date using date -s 2015-01-01 the date will be updated but will revert to the host's date after a few seconds.
Since I end up googling the correct way to disable the time synchronization in an Ubuntu VirtualBox client every time I set up my VM from scratch, I am posting the steps here as my personal reminder (it is always nice to get one's own article in a google result because one has forgotten ;)) - and maybe someone else also finds this useful:
- Disable host time access (this is mentioned here - no idea if this is really required...):
On the host, execute:VBoxManage setextradata "vm-name" "VBoxInternal/Devices/VMMDev/0/Config/GetHostTimeDisabled" 1 - Disable client time sync:
On the client, edit/opt/VBoxGuestAdditions-5.1.2/init/vboxadd-serviceand instart()replacedaemon $binary --pidfile $PIDFILE > /dev/null
withdaemon $binary --disable-timesync --pidfile $PIDFILE > /dev/null
and also look for the definition ofdaemon()and add the fourth argumentif which start-stop-daemon >/dev/null 2>&1; then
daemon() {
start-stop-daemon --start --exec $1 -- $2 $3 $4
}
... -
Just to be sure, remove the Ubuntu timesyncd as well:
On the client, execute:rm /etc/systemd/system/sysinit.target.wants/systemd-timesyncd.service
Reboot and from now on, changed system dates stay as intended.
BTW, I would like to be able to decouple the system time in docker as well, but from my understanding this is not possible because docker uses the host RTC directly and the only way to differ here is to set a different timezone, which has its limitations. But if someone knows a way to simulate a different system time in docker, I would love to hear about it!
- Details
- Category: Tools
Read more: Disabling time synchronization in VirtualBox + Ubuntu 16.04
Today was not the first time, I made a common mistake with NatTable layers. And since it always takes a few minutes until I identify the problem, I'll post it here (as note to myself and maybe because it is helpful for anyone else ...).
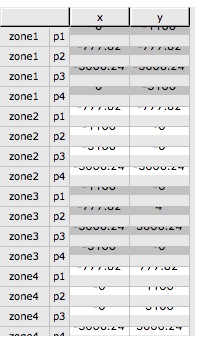
The symptom is that when scrolling in a NatTable, it is not–or not only–the NatTable which is scrolling, but each cell seems to be dislocated in itself, leading to this:

The problem lies in my misinterpretation of the constructor JavaDoc of ColumnHeaderLayer (or RowHeaderLayer), which states for the second argument:
horizontalLayerDependency – The layer to link the horizontal dimension to, typically the body layer
It turns out, that I usually confuse the body data layer with the body layer. For my typical tables, the main part of the table is composed of the body data layer, the selection layer, and the viewport layer on top.
The image shown above is usually the result of giving the body data layer as the horizontalLayerDependency parameter instead of the viewport layer (which is correct, because the viewport layer (as the topmost layer of the body layer stack) plays the role of the body layer in the sense of the ColumnHeaderLayer constructor's horizontal layer dependency).
So, should you ever encounter the above symptom, check your ColumnHeaderLayer and RowHeaderLayer constructor for the correct layer arguments.
- Details
- Category: Eclipse
I am currently working for a customer on an existing Eclipse RCP (based on Luna) which consists of 99% Eclipse 3.x API. The customer wants to migrate to E4 gradually, but there is no budget to migrate existing code all at once. Instead, the plan is to start using e4 with new features and migrate the other code step by step.
So, when I was given the task of creating a new view, I wanted to use the "new" (in Luna, anyways) e4view element for the org.eclipse.ui.views extension point. The good thing about this is that you can easily write JUnit tests for the new class because it is a POJO and does not have many dependencies.
My problem is that part of the customer's RCP uses Xtext and several components or "services" (not actual services in an OSGi sense) are available via Guice.
So I was confronted with the requirement to get a dependency available via Guice injected in an E4-style view implementation:
public class MyViewPart
{
    @Inject // <- should be injected via Guice
    ISomeCustomComponent component;

    @PostConstruct // <- should be called and injected via E4 DI
    public void createView(Composite parent)
    {
        // ...
    }
}
- Details
- Category: Eclipse
Read more: Using an e4view in combination with Guice injection
One of my customers is still working with a Luna target platform on Windows (they have lots of divisions and need to coordinate a standard target platform among all of them, which is why the process of updating to a newer version is always a bit slow). Recently, they have switched their IDE provisioning to a custom Oomph-based setup.
As I often do remote development for them, I wanted to install the provided IDE with all the team-wide settings as well on my own laptop. So I liked the idea of taking the Oomph setup model and install the IDE with it on my Mac. But I didn’t come far. The Eclipse Installer opened (in advanced mode), the (custom) product was displayed, but I was not able to select it. The installer showed me this message:
The selected product has no versions that can be installed on this platform.
- Details
- Category: Eclipse
Read more: Installing Eclipse Luna or older using Eclipse Installer (Oomph)
